Golem

From Dead Cells Wiki
Jump to navigation Jump to search

Golems are enemies encountered solely in the Slumbering Sanctuary.

Behavior[edit]

While the Sanctuary is still inactive, Golems are immobile statues of stone. They awaken when the Ancient Temple switch is activated.

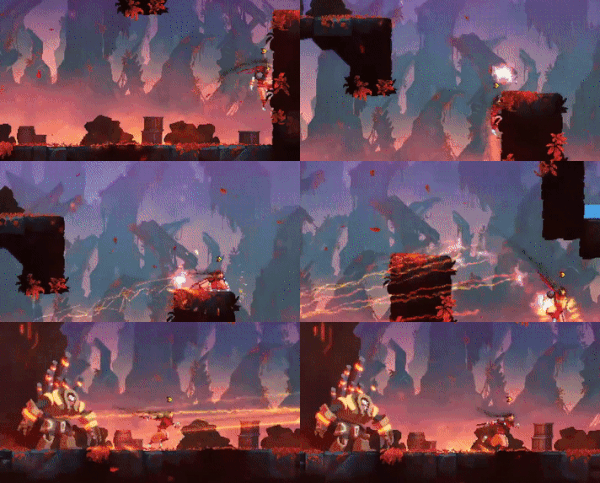
Retreating from a Golem is nearly impossible, as they teleport the player to them if one gets too far away or on another platform that is higher or lower than the Golem. As such, when a Golem catches sight of you, you're committed to fighting them. It is impossible to outrun a Golem, even if you reach the teleporter. It will also teleport the player upon seeing any deployable skill deployed by them.

Golems attack by doing a dashing punch for a long distance. When at low health the Golem can also perform a long-range slam that covers the entire platform. This cannot be rolled or parried, and it's very likely to get hit by a punch afterwards.

Moveset[edit]

Punch dash
  • Description: Dashes towards the player while punching.
  • Can be blocked, parried, or dodge rolled.
GolemPunchTutorial.gif
Shattering slam
  • Description: Performs a long-range slam, spawning shockwaves that cover the entire platform.
  • Cannot be blocked, parried, or dodge rolled.
GolemSlamTutorial.gif
Grapple teleport
  • Description: When the player is too far from the Golem to attack, the Golem will teleport the player directly to it. This move deals no damage.
  • Cannot be blocked, parried, or dodge rolled.
GolemTeleportTutorial.gif

Strategy[edit]

When dealing with Golems, be very cautious of their attacks; they do major damage and can lead the player to their death in groups of enemies. Try to pick off any enemies near a Golem and fight them alone. Both of the Golem's attacks are fast and somewhat hard to telegraph. Unlike his punch however, his earth-shatter can't be parried, and can deal significant damage if it hits. To prevent this, jumping and rolling when he prepares a strike can be vital to dodge both. Since his punch goes extremely fast, running from his attack would only lead to getting hit. As long as the player can proficiently dodge their brutal attacks, Golems can be dealt with. It is advisable to dodge towards the direction of the golem's punch to catch them in a vulnerable pause.

Trivia[edit]

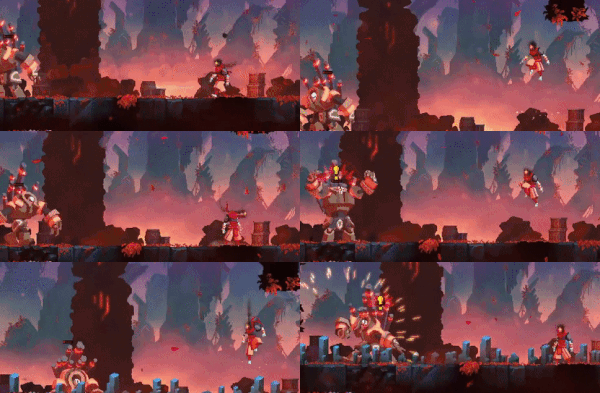
  • The Golem is one of the few enemies shown in the Dead Cells animated trailer. The Beheaded initially fights one with a whip, causing the golem to throw him to a wall instead. A second golem was swiftly dispatched with the Vorpan Icon.png Vorpan afterwards.

History[edit]

  • 0.4: Introduced.
  • 0.6: Can't teleport the player anymore when they are invisible.
  • 1.4: Can no longer spawn with the clone elite ability.
Enemies

Zombie.pngZombie  •  Shieldbearer.pngShieldbearer  •  Undead Archer.pngUndead Archer  •  Grenadier.pngGrenadier  •  Oven Knight.pngOven Knight  •  Knife Thrower.pngKnife Thrower  •  Rampager.pngRampager  •  Failed Experiment.pngFailed Experiment  •  Runner.pngRunner  •  Bat.pngBat  •  Protector.pngProtector  •  Scorpion.pngScorpion  •  Disgusting Worm.pngDisgusting Worm  •  Kamikaze.pngKamikaze  •  Rancid Rat.pngRancid Rat  •  Yeeter.pngYeeterTBS  •  Jerkshroom.pngJerkshroomTBS  •  Thorny.pngThorny  •  Slasher.pngSlasher  •  Masker.pngMasker  •  Hammer.pngHammer  •  Sewer Fly.pngSewer Fly  •  Lacerator.pngLacerator  •  Slammer.pngSlammer  •  Shocker.pngShocker  •  Toxic Miasma.pngToxic Miasma  •  Buzzcutter.pngBuzzcutter  •  Inquisitor.pngInquisitor  •  Sweeper.pngSweeper  •  Festering Zombie.pngFestering Zombie  •  Corpse Worm.pngCorpse Worm  •  Impaler (Enemy).pngImpaler  •  Sewer's Tentacle.pngSewer's Tentacle  •  Spawner.pngSpawner  •  Corpse Juice.pngCorpse Juice  •  Bomber.pngBomber  •  Banished.pngBanishedTBS  •  Blowgunner.pngBlowgunnerTBS  •  Giant Tick.pngGiant TickTBS  •  Weaver Worm.pngWeaver Worm  •  Cleaver (Enemy).pngCleaver  •  Pirate Captain.pngPirate Captain  •  Weirded Warrior.pngWeirded Warrior  •  Swarm Zombie.pngSwarm Zombie  •  Corpse Fly.pngCorpse Fly  •  Catcher.pngCatcher  •  Caster.pngCaster  •  Golem.pngGolem  •  Dancer.pngDancer  •  Dark Tracker.pngDark Tracker  •  Corpulent Zombie.pngCorpulent Zombie  •  Cannibal.pngCannibal  •  Bombardier.pngBombardier  •  Automaton.pngAutomaton  •  Ground Shaker.pngGround ShakerRotG  •  Arbiter.pngArbiterRotG  •  Demon.pngDemon  •  Skeleton.pngSkeletonRotG  •  Myopic Crow.pngMyopic CrowFF  •  Cold Blooded Guardian.pngCold Blooded GuardianFF  •  Stone Warden.pngStone WardenFF  •  Apostate.pngApostateFF  •  Failed Homunculus.pngFailed HomunculusFF  •  Clumsy Swordsman.pngClumsy SwordsmanFF  •  Dastardly Archer.pngDastardly ArcherFF  •  Compulsive Gravedigger.pngCompulsive GravediggerFF  •  Guardian Knight.pngGuardian Knight  •  Lancer.pngLancer  •  Royal Guard.pngRoyal Guard  •  Infected Worker.pngInfected Worker  •  Living Barrel.pngLiving Barrel  •  Demolisher.pngDemolisher  •  Mutineer.pngMutineerTQatS  •  Armored Shrimp.pngArmored ShrimpTQatS  •  Agitated Pickpocket.pngAgitated Pickpocket  •  Gold Gorger.pngGold Gorger  •  Golden Kamikaze.pngGolden Kamikaze  •  Mimic.pngMimic  •  Merman.pngMermanRtC  •  Buer.pngBuerRtC  •  Werewolf.pngWerewolfRtC  •  Dire Werewolf.pngDire WerewolfRtC  •  Armor Knight.pngArmor KnightRtC  •  Axe Armor.pngAxe ArmorRtC  •  Throw Master.pngThrow MasterRtC  •  Vampire Bat.pngVampire BatRtC  •  Harpy.pngHarpyRtC  •  Bone Pillar.pngBone PillarRtC  •  Medusa.pngMedusaRtC

link True Ending Spoiler (5 BSC):   Magistrate of Death.pngMagistrate of DeathRotG  •  Screaming Skull.pngScreaming SkullRotG  •  Librarian.pngLibrarianRotG  •  Defender.pngDefenderRotG